Use MetaMask Smart Accounts with Scaffold-ETH 2
Use the MetaMask Smart Accounts extension for Scaffold-ETH 2 to bootstrap a project in under two minutes. This extension helps you quickly generate the boilerplate code to create an embedded smart accountMetaMask smart account A smart contract account that supports programmable behavior, delegated permissions, flexible signing options, and other advanced features., and complete the delegationDelegation The ability for a MetaMask smart account to authorize another account to perform specific executions on its behalf. lifecycle (create, sign, and redeem a delegation).
Prerequisites
- Install Node.js v20.18.3 or later.
- Install Yarn package manager.
- Install Git.
- Create a Pimlico API key.
Steps
1. Install the extension
Run the following command to install the Smart Accounts KitSmart Accounts Kit Toolkit for creating, managing, and interacting with MetaMask Smart Accounts, delegations, and Advanced Permissions. extension:
npx create-eth@latest -e metamask/gator-extension your-project-name
2. Set up enviroment variables
Navigate into the project's nextjs package, and create a .env.local file. Once created, update the
NEXT_PUBLIC_PIMLICO_API_KEY environment variable with your Pimlico API Key.
cd your-project-name/packages/nextjs
cp .env.example .env.local
3. Start the frontend
In the project's root directory start the development server.
yarn start
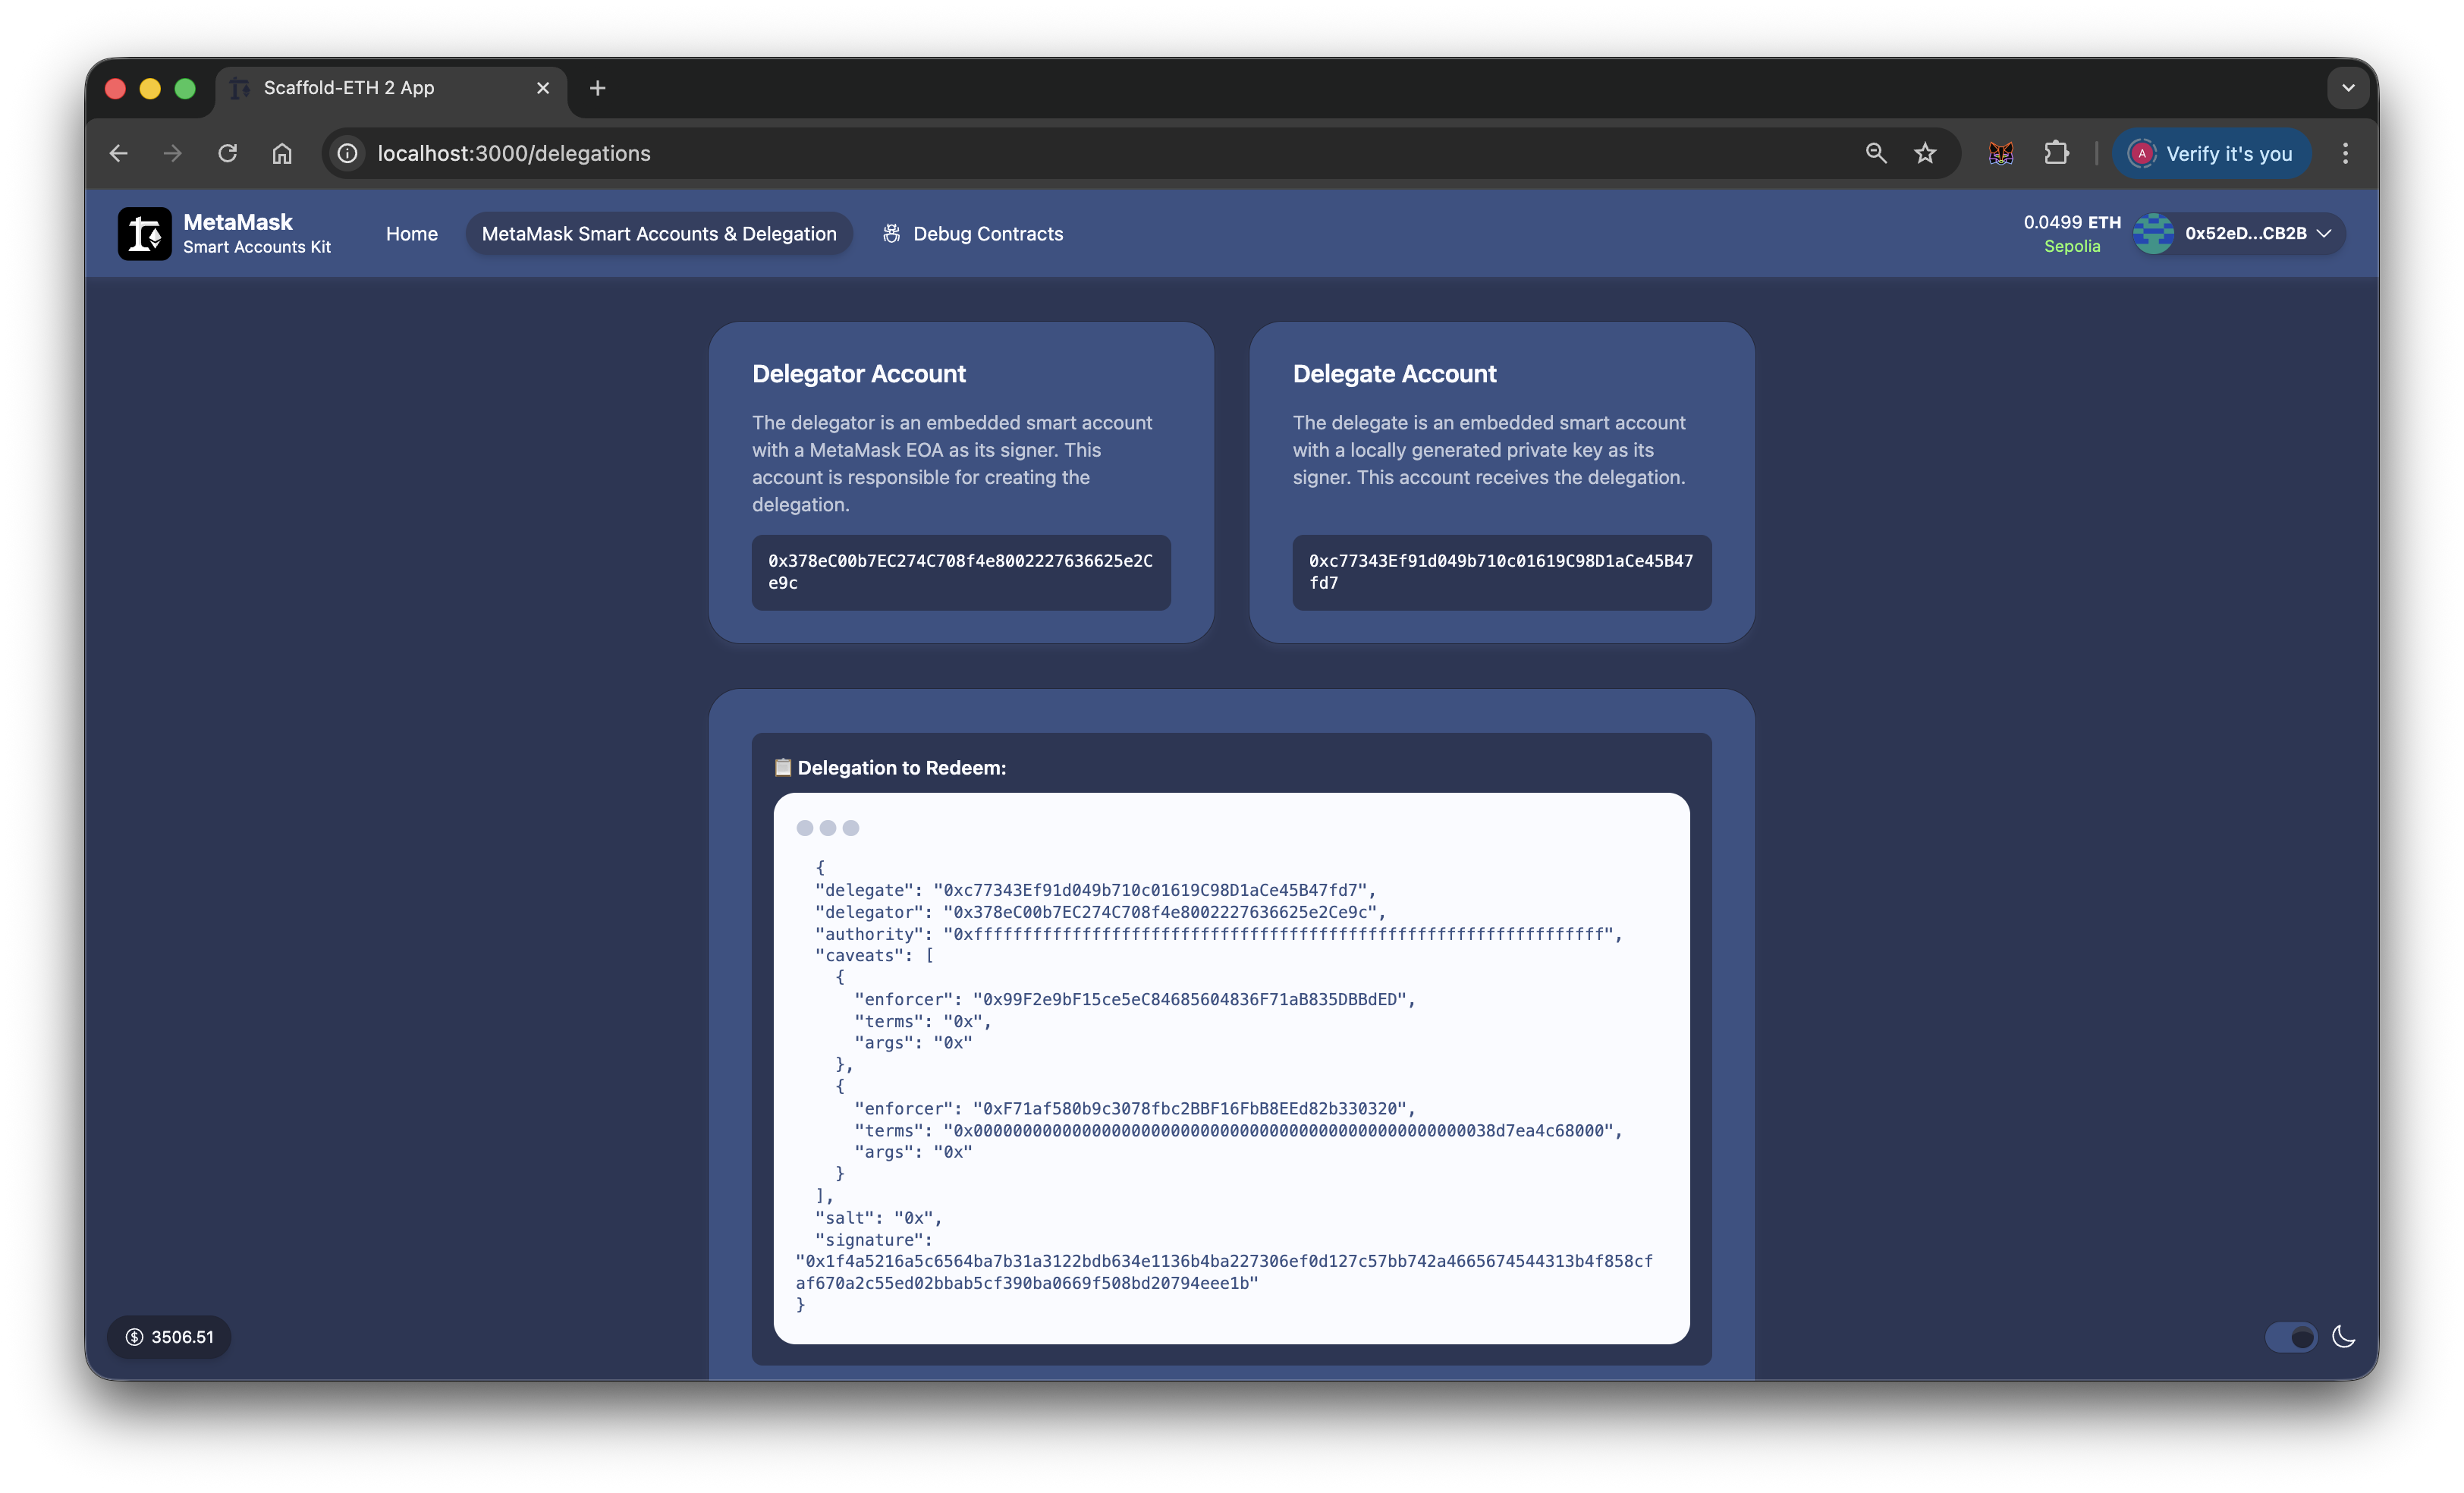
4. Complete the delegation lifecycle
Navigate to the MetaMask Smart Accounts & Delegation page in your Scaffold-ETH frontend at http://localhost:3000/delegations, and follow the steps to deploy a delegator accountDelegator account The account that creates and signs a delegation to grant limited authority to another account., create a delegateDelegate account The account that receives delegated authority and can redeem a delegation under its constraints. wallet, and create and redeem a delegation.
You can view the completed transaction on Etherscan.
Next steps
Learn more about MetaMask Smart Accounts and delegation.